MyArcadePlugin Installation
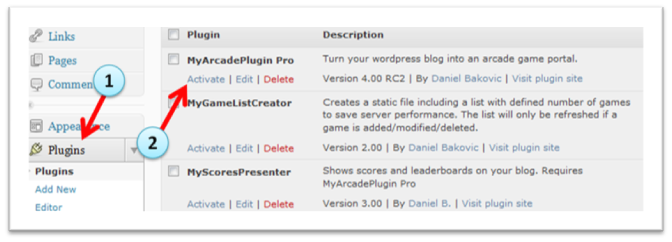
After you have installed WordPress and downloaded MyArcadePlugin Pro, you will need to install it. Follow these steps if you are installing MyArcadePlugin for the first time:
- Downloaded MyArcadePlugin Pro ZIP file from your MyArcade Account » Downloads
- Go to your WordPress admin area
- Visit Plugins » Add New page
- Click on the Upload Plugin button and select the MyArcadePlugin Pro ZIP file
- Click on the Install Now button. WordPress will now upload the plugin file from your computer and install it.
- Click on Activate Plugin link to activate MyArcadePlugin Pro

MyArcadePlugin Upgrade
MyArcadePlugin has built-in auto-update feature. That means that you will be notified on your WordPress Dashboard when a new version gets release but you can also use the manual way to update the plugin:
- Deactivate and delete the old version
- Follow the installation process above
MyArcadePlugin Activation
Once MyArcadePlugin Pro is activated, you will need to enter your personal license key to enable all the premium features.
You have received your personal key with the download link immediately after the purchase.
After the license key verification, you will need to setup MyArcadePlugin Pro.
